How to configure the Moderne CLI DevCenter
The Moderne DevCenter provides you with high-level details about the state of all of your repositories. Using it, you can track the progress of upgrades, migrations, and security vulnerabilities. You may be aware of this feature in the Moderne Platform - but did you know that you can generate a DevCenter locally via the CLI?
In this guide, we'll walk you through how to do that.
Prerequisities
This guide assumes that you have already installed and configured the CLI.
Step 1: Checkout the repositories you want to build a DevCenter for
The first thing you'll need to do is come up with the list of repositories that you want to build a DevCenter for. Once you have that list, please ensure they are cloned to a shared directory locally. For instance, this might look like:
devcenter-demo
├── repo1
├── repo2
└── repo3
You may find it useful to start by only cloning a small subset of your repositories locally so that you can test, build, and iterate quickly. Once you've confirmed everything is working as you want, you can then add more repositories as desired.
We'd recommend using the mod git clone command to create this shared directory. With it, you can clone repositories from a CSV file, a JSON file, or from an existing organization (if your company has set up an Organizations service).
Step 2: Build the LSTs
With the repositories cloned, you now need to build or download LSTs to run DevCenter recipes on:
mod build devcenter-demo
Step 3: Install DevCenter starter recipes
Starting with CLI v3.42.0, DevCenter dashboards are built using YAML declarative recipes composed with recipes provided by the rewrite-devcenter recipe artifact. To install the latest version of rewrite-devcenter, run the following command:
mod config recipes jar install io.moderne.recipe:rewrite-devcenter:LATEST
Step 4: Generate the DevCenterStarter dashboard
rewrite-devcenter includes an example DevCenterStarter recipe which you can run as follows:
mod run devcenter-demo --recipe io.moderne.devcenter.DevCenterStarter
This recipe will generate the data tables required to build the DevCenter dashboard using the command:
mod devcenter devcenter-demo --last-recipe-run
Once complete, mod devcenter will provide the location of the DevCenter dashboard:
> Generating DevCenter

Done (26s)

* What to do next
    > Open /Users/brycetompkins/repos/devcenter-demo/devcenter.html

MOD SUCCEEDED in 27s
Open the HTML file to view your DevCenter dashboard:
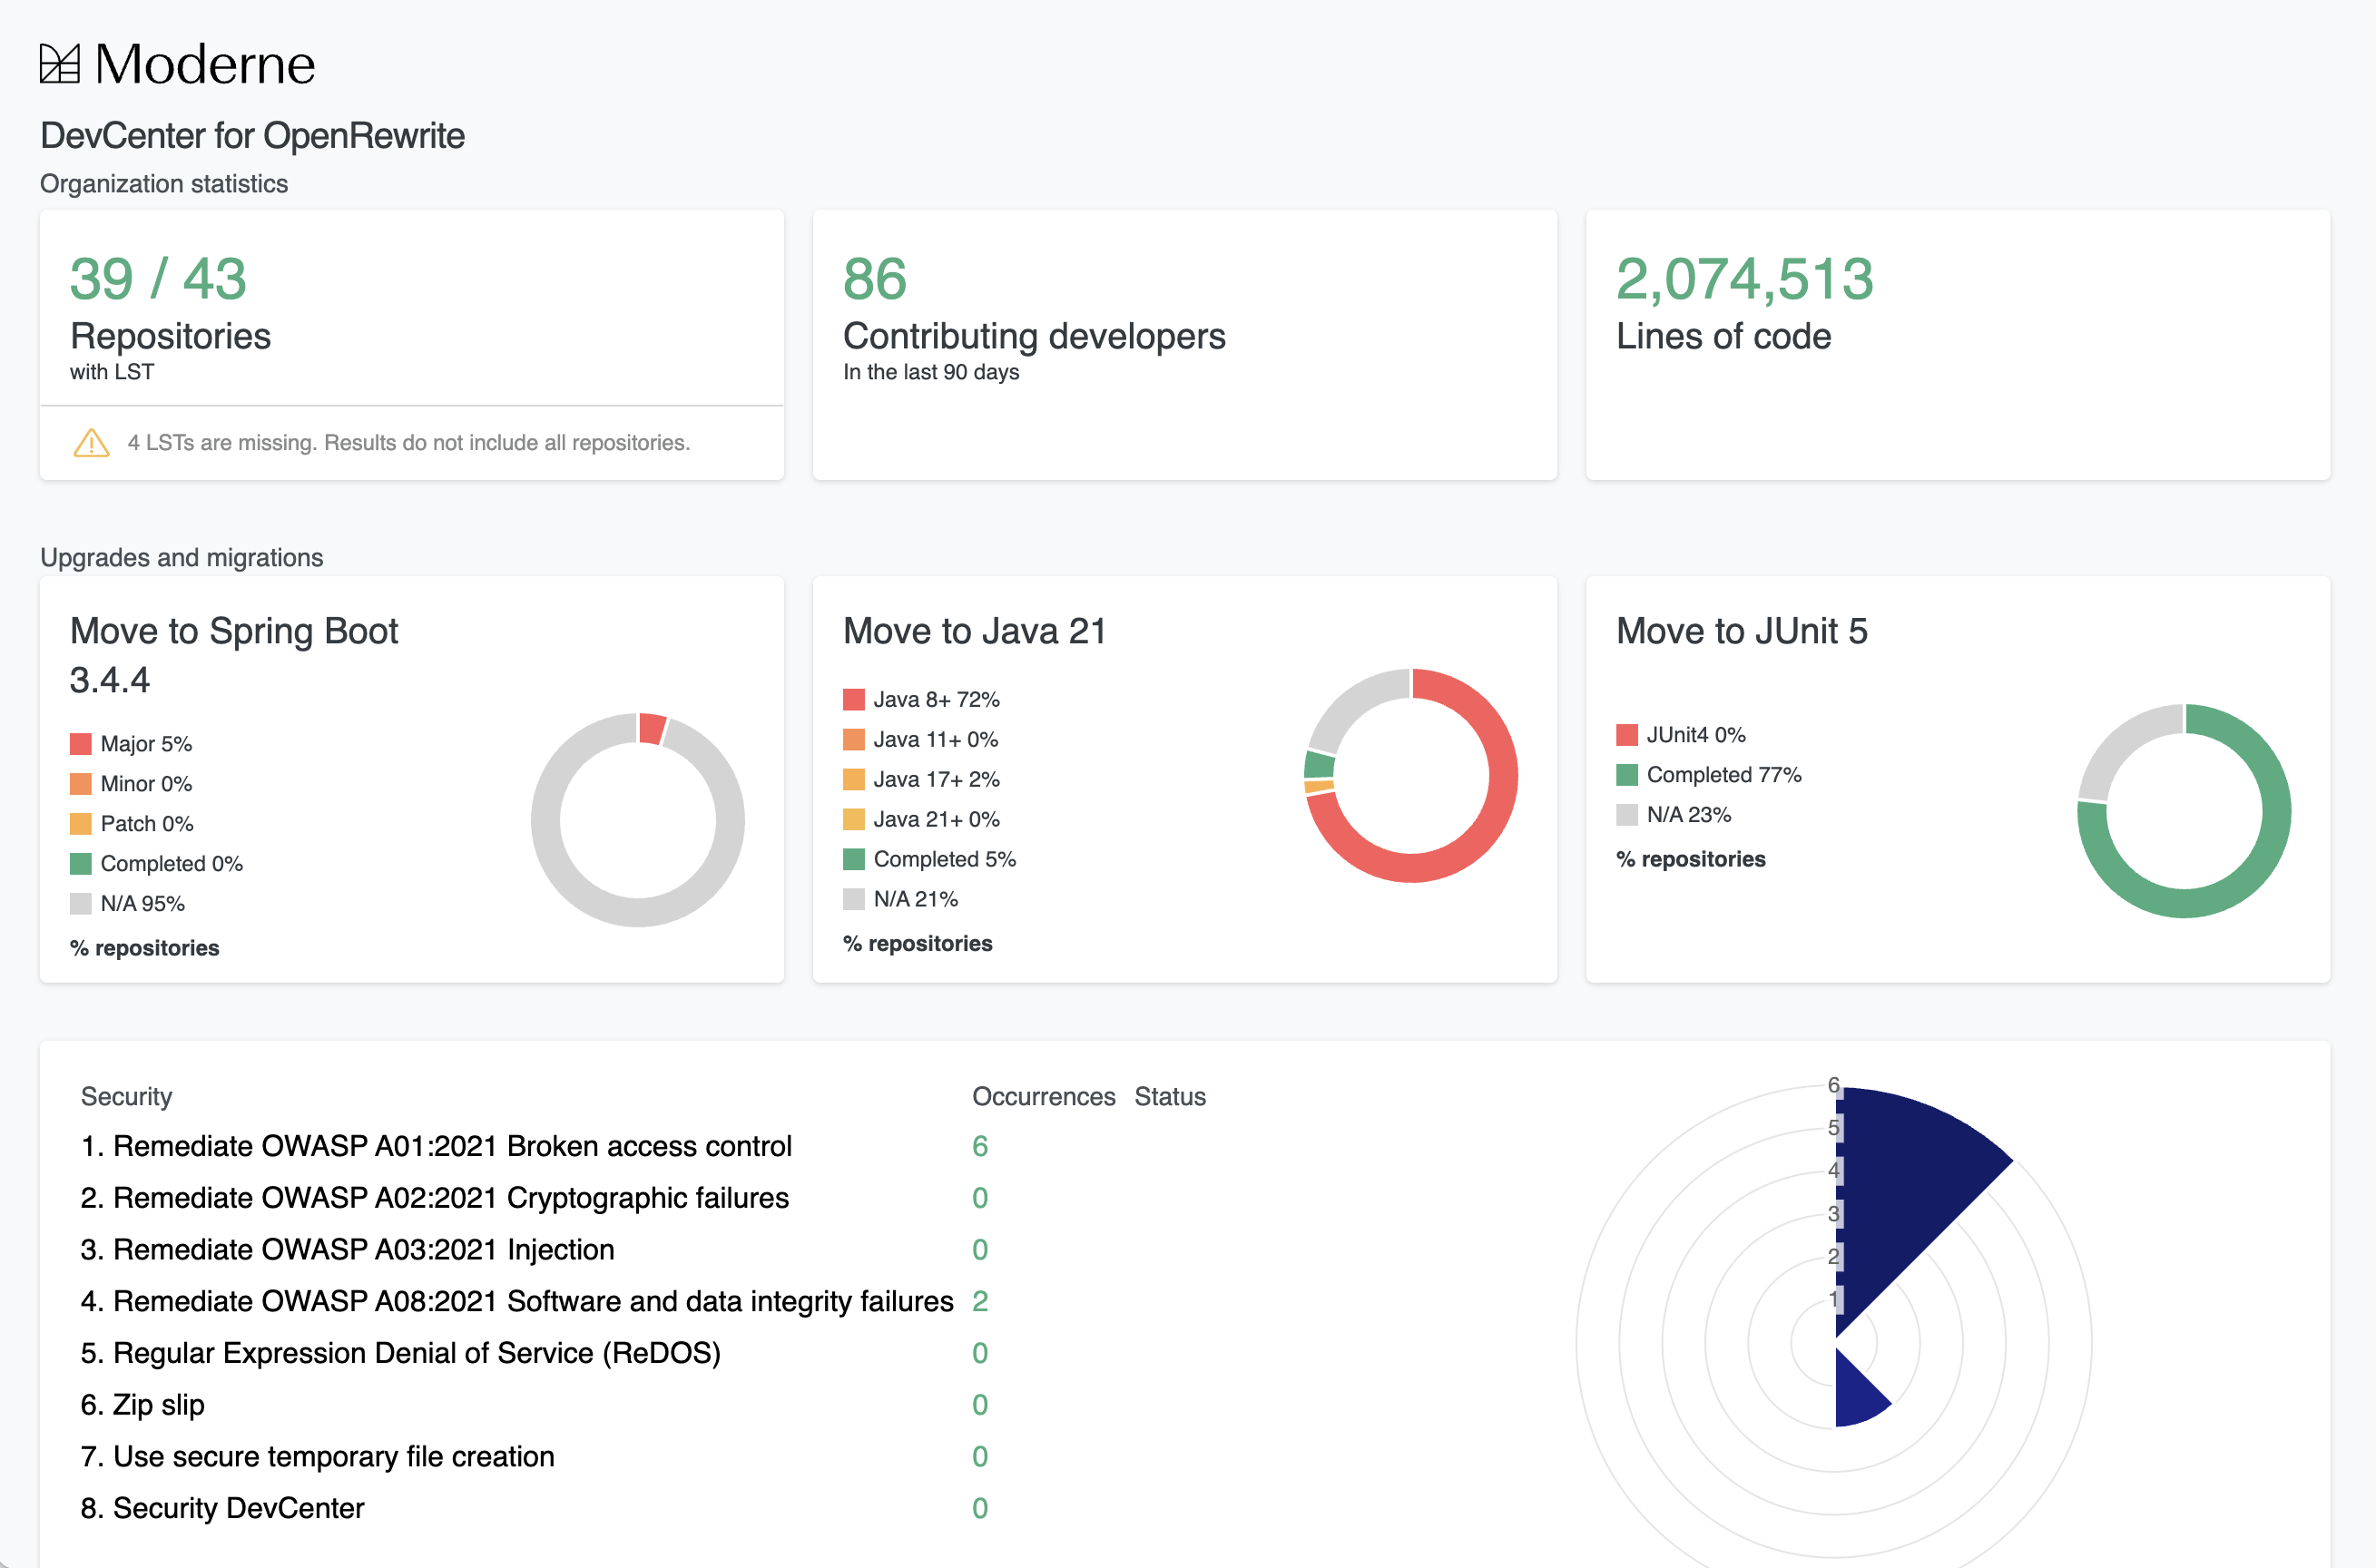
Step 5: Create your custom DevCenter recipe
The source for the DevCenterStarter recipe can be found here. You can use this recipe as a starting point to configure a custom DevCenter dashboard.
Make sure to give your recipes unique names so as not to conflict with installed starter recipes.
Once complete, you can install the recipe to the local recipe marketplace with the command:
mod config recipes yaml install MyDevCenter.yml
Next, run the recipe and generate the dashboard:
mod run dashboard-demo --recipe com.acme.MyDevCenter
mod devcenter dashboard-demo --last-recipe-run
Next steps
Once you've arrived at a DevCenter that you like, consider sharing it with your team by publishing the recipe to your Moderne recipe marketplace using the command mod config recipes moderne push.